How To Add Captions in CapCut (Step-by-Step Guide)
Captions can make videos more engaging and fun to watch. They also help viewers understand what you are saying more easily. We see engaging YouTube shorts, TikTok reels, and reels with captions everywhere.
Prominent YouTubers like MrBeast, Alex Harmozi, and Ali Abdal are implementing captions in their videos. It Helps increase audience retention and build a brand.
Today, I will show you how to add captions to your videos using CapCut Desktop and mobile app. This step-by-step guide will show you how to automatically add captions, style them, use best practices, and more.
Table of Contents
Why Add Captions?
- Accessibility: Captions make your content accessible to viewers outdoors or people with hearing impairments, making it easier for them to enjoy it.
- Engagement: Captions hold the viewer’s attention for longer, which means more watch time. Watching videos without audio might be more engaging for viewers if they have captions.
- SEO: Captions can improve the searchability of your videos, making them easier to find.
Step-by-Step Guide to Add Captions in CapCut
Step 1: Launch CapCut and Create a New Project
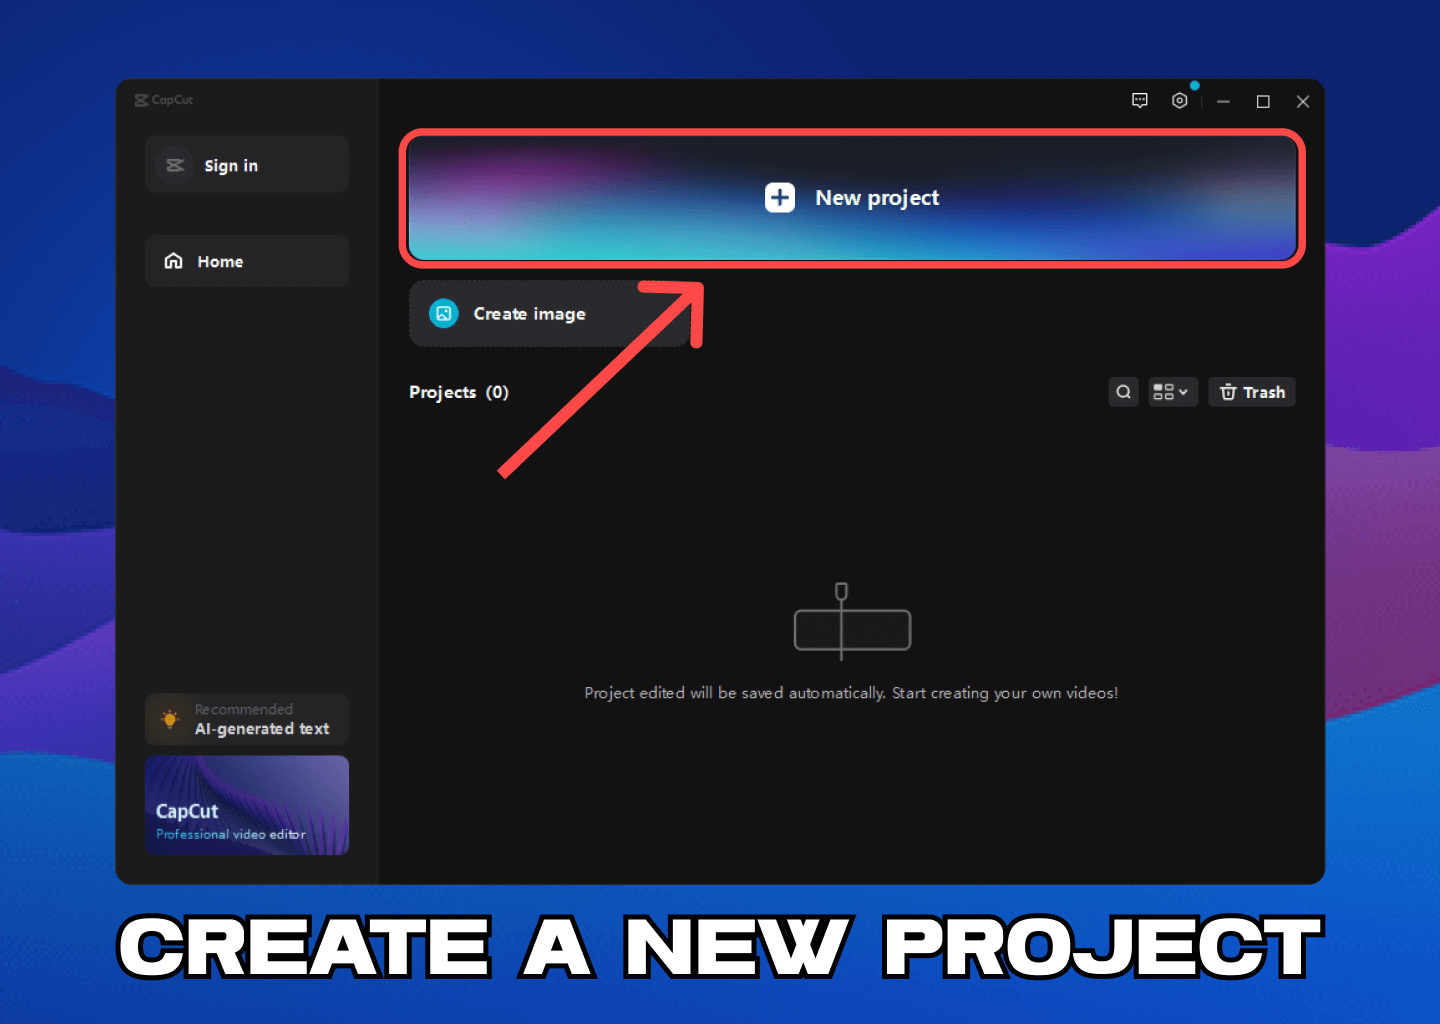
- Open CapCut: Open your CapCut app on your mobile device or desktop.
- Create a New Project: Tap the “+” button to create a new project and give it a name.
Step 2: Import Your Video
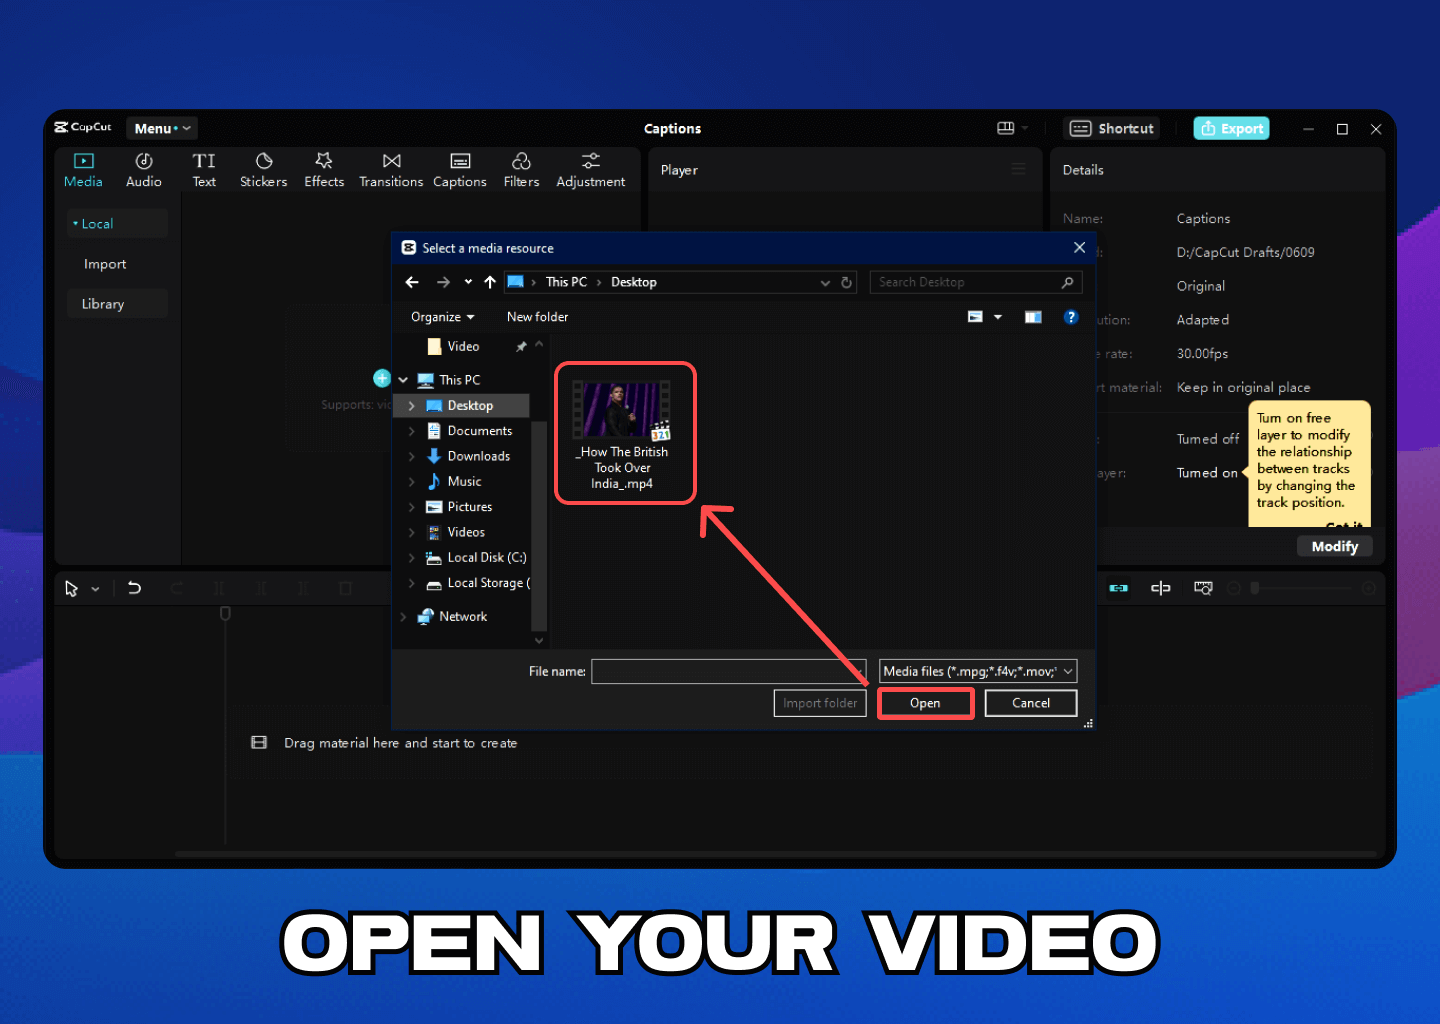
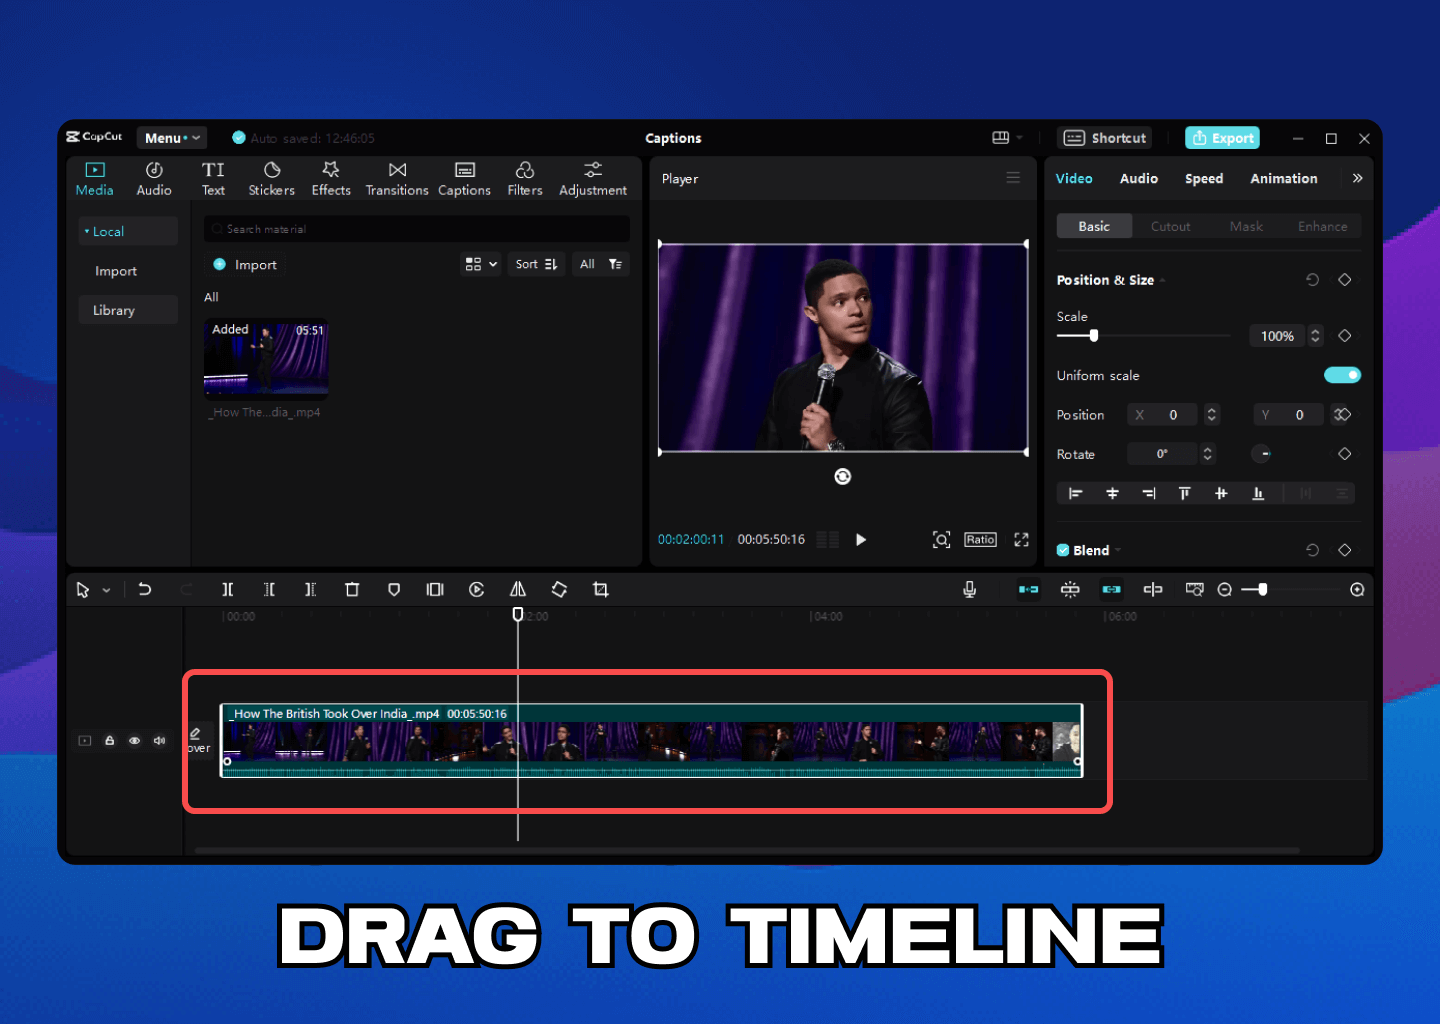
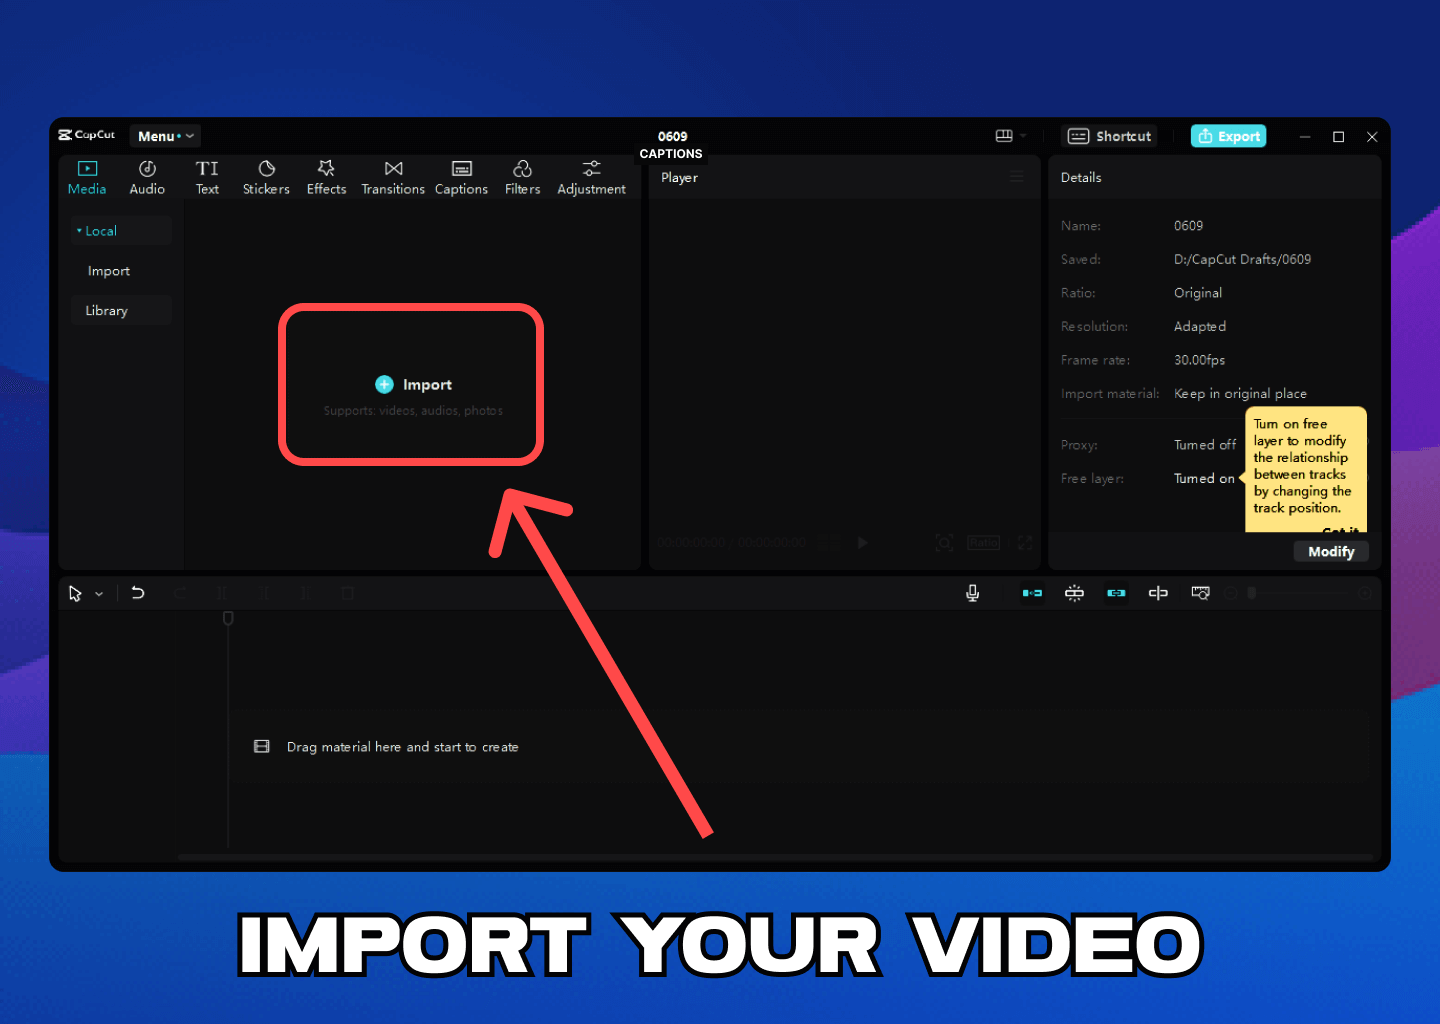
- Import Your Video: Click the “Import” button and choose your video file from your device.
- Add video to Timeline: Drag and drop the video to your CapCut timeline.
Step 3: Add Auto Captions
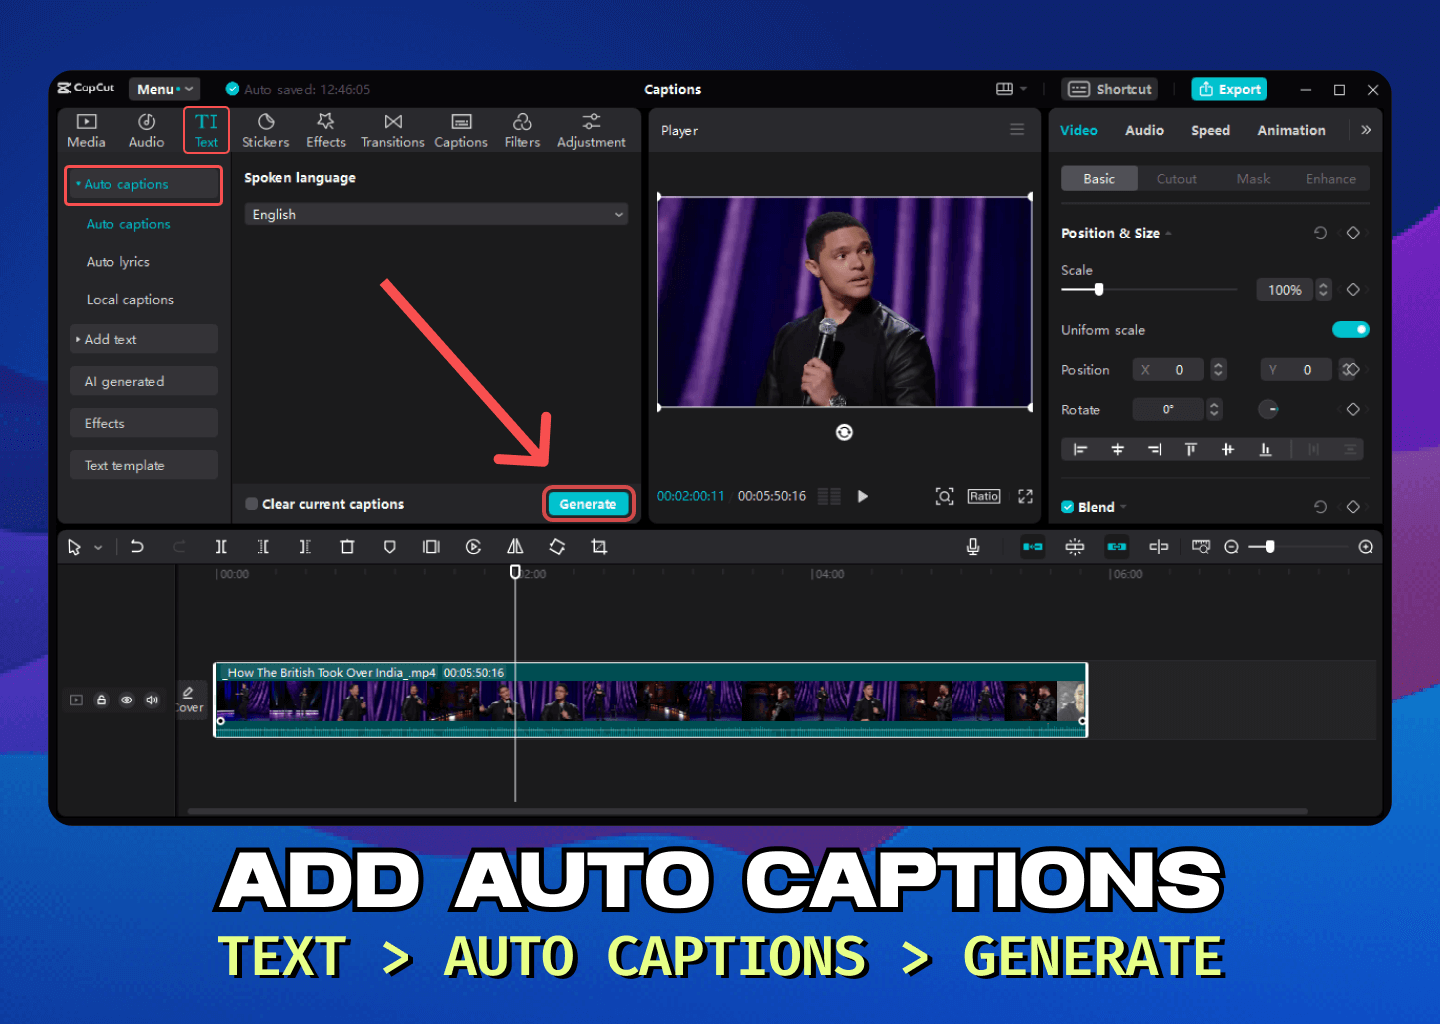
- To access the Text Tool, Click the ‘Text’ button in the top menu and select the “auto-captions” option.
- Select Language & Generate: Select your spoken language from the dropdown menu, click the “Generate” button, and wait. It will start automatically generating captions for your videos.
Step 4: Edit Captions
- Fix Captions: Sometimes, the captions may not be correct, so you must manually check if everything is correct. You can fix them by going to the captions tab from the right sidebar.
- Synchronize Text: Synchronize the captions with the voiceover or audio. You can drag them to match if they do not match the audio timeline.
Step 5: Customize the caption
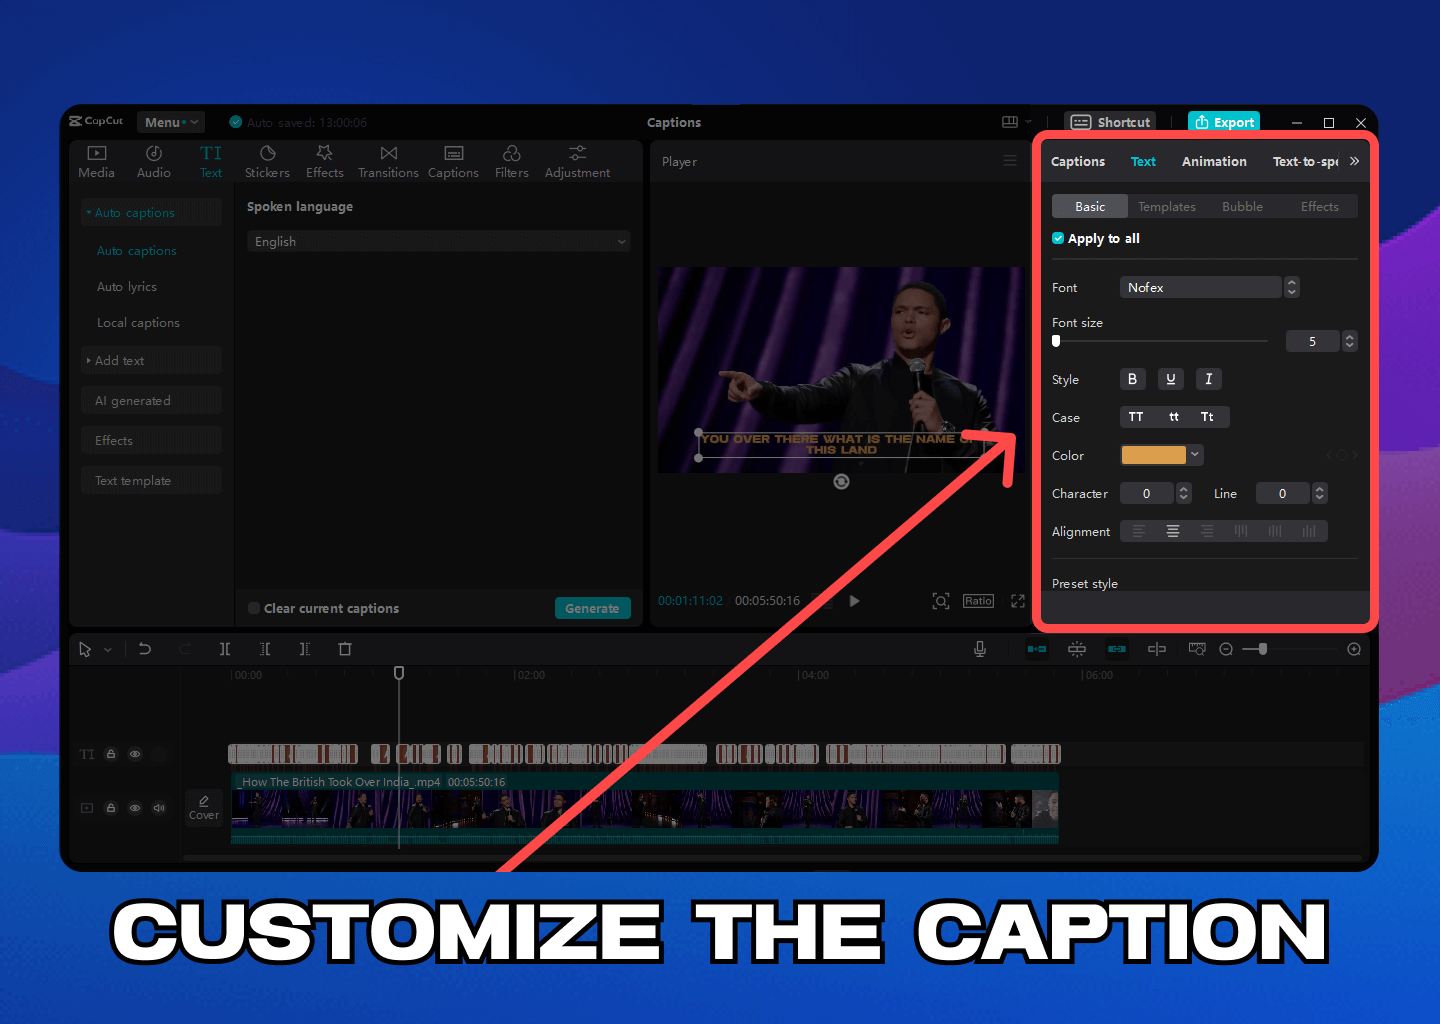
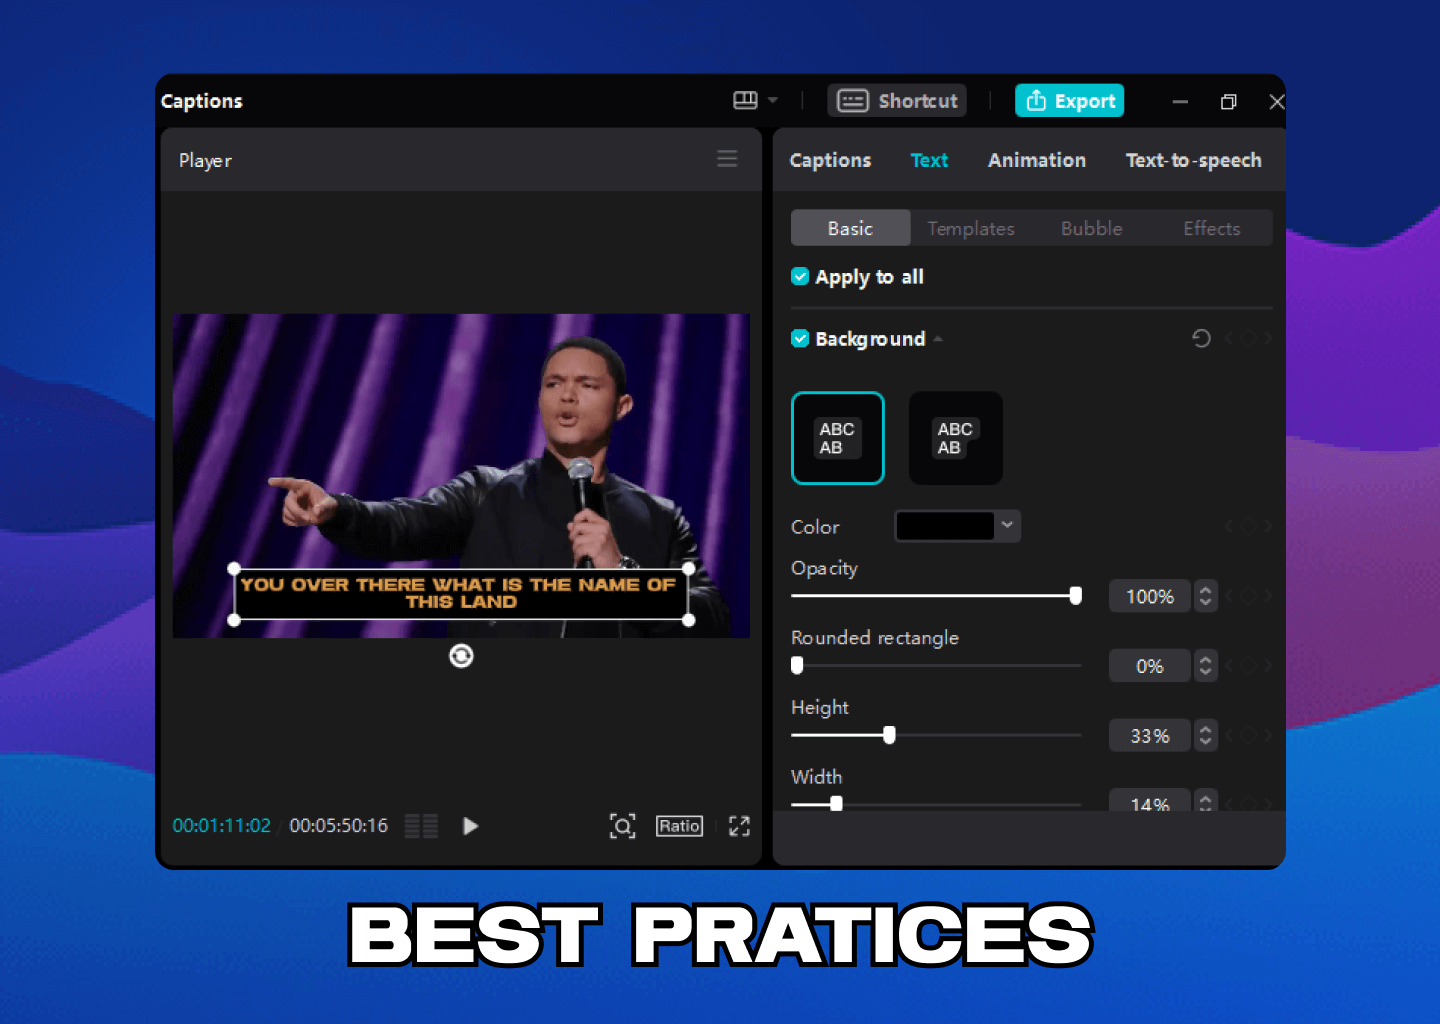
- Change Text Color: You should choose a color that contrasts nicely with the background.
- Add Text Shadow: Give it an excellent background shadow. It makes it easier to read the caption.
Step 6: Finalize and Export Your Video
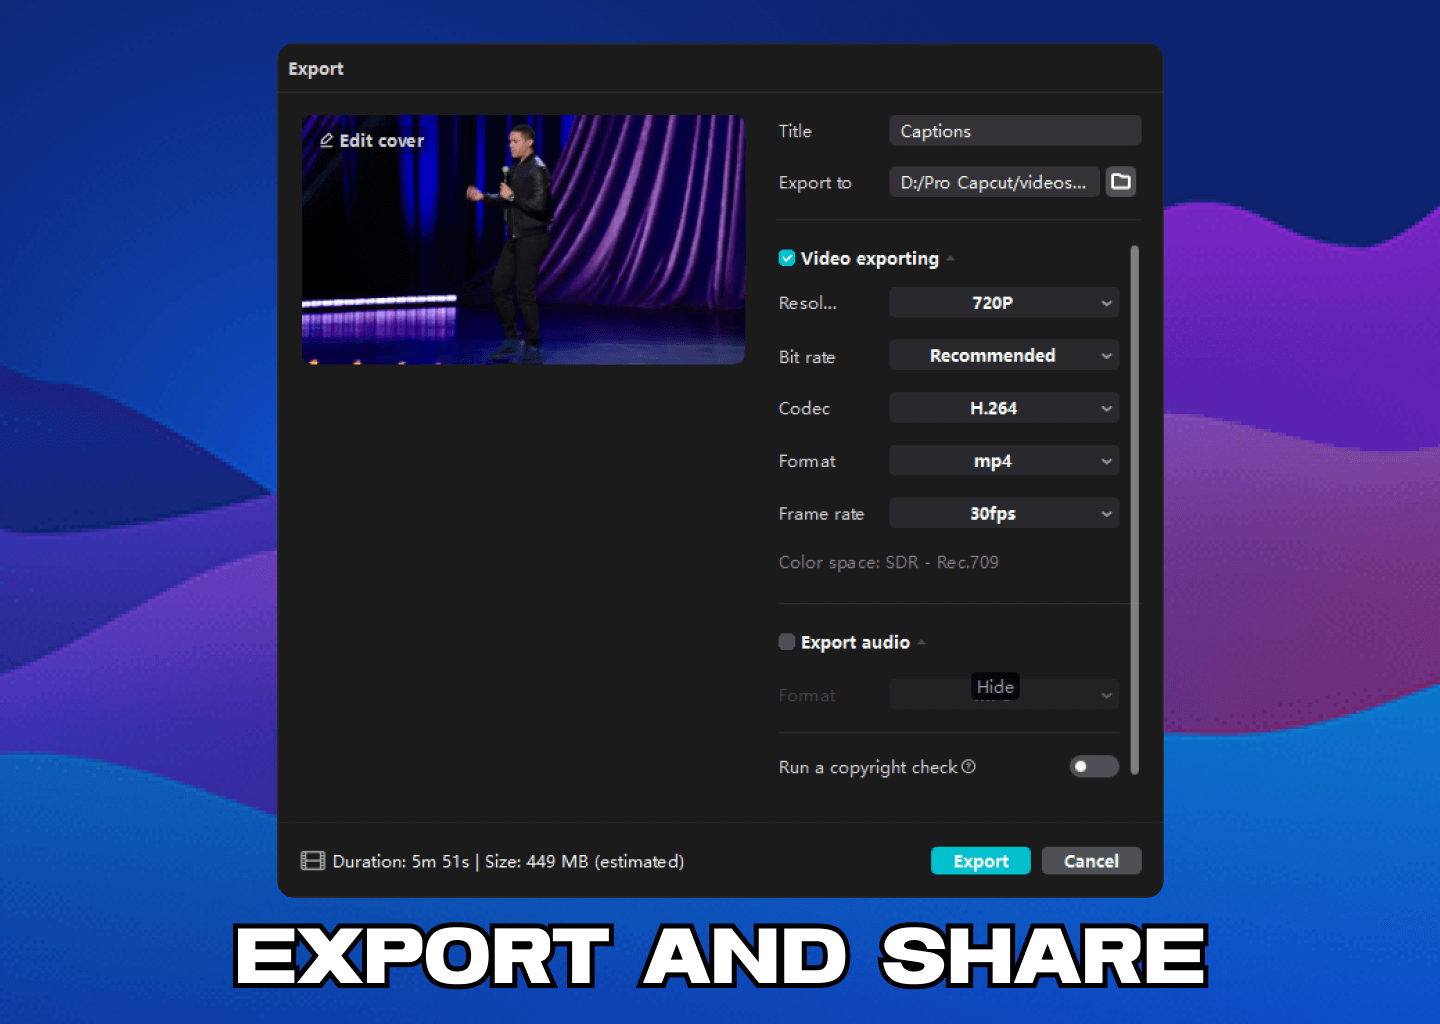
- Preview Your Video: Play back the video to ensure the captions are correctly placed.
- Export Video: Once you are satisfied, click the “Export” button, choose your desired settings, and Save the video to your device.
Step 7: Share Your Video
Now, you can share your creation with the world to see. Upload your videos same time everyday to get more views. It will increase the level of connection between you and your audience.
Best Practices for Captions
- Ensure Visibility: Font Choice: Use clear, readable fonts like Arial or Helvetica. Bold fonts help viewers understand what you are saying faster. Avoid using fancy fonts. Contrast: Make sure the color of your text contrasts well with the video background. You can also use a box shadow on your captions.
- Keep Captions Short & Concise: Short Sentences: Break longer sentences into shorter, more digestible segments. Timing: Sync captions accurately with the voiceover. Edit it manually if needed.
- Match Your Branding: Style Consistency: Use fonts and colors that match your brand identity. This will make it easier for viewers to install Identify Your Videos. Incorporate Emojis: Emojis can add a personal touch to your captions. Make sure to use emojis relevant to the video’s subject.
Conclusion
With CapCut, adding captions to your videos is a simple and effective way to improve the accessibility and engagement of your content. By following this article’s instructions and best practices, you can make engaging captioned videos that appeal to larger audiences. Proper captions are vital for modern video creation.
This tutorial will help you learn how to use CapCut to add captions while learning the value and best practices of captioning. Please let me know if you want anything more detailed!


