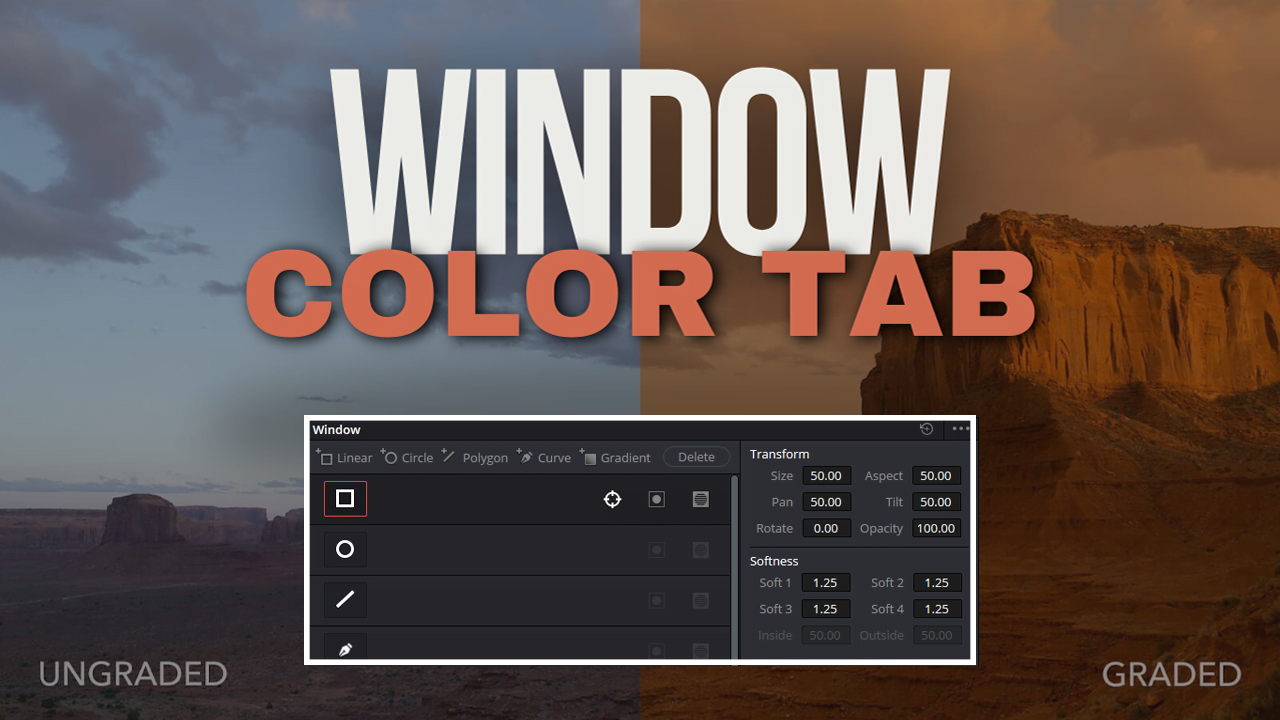
One of the major tools for color grading in DaVinci Resolve Studio 19 is the Windows Palette. This amazing tool can apply exact colors depending on the area of an image you want to isolate, making sure every detail is perfect!
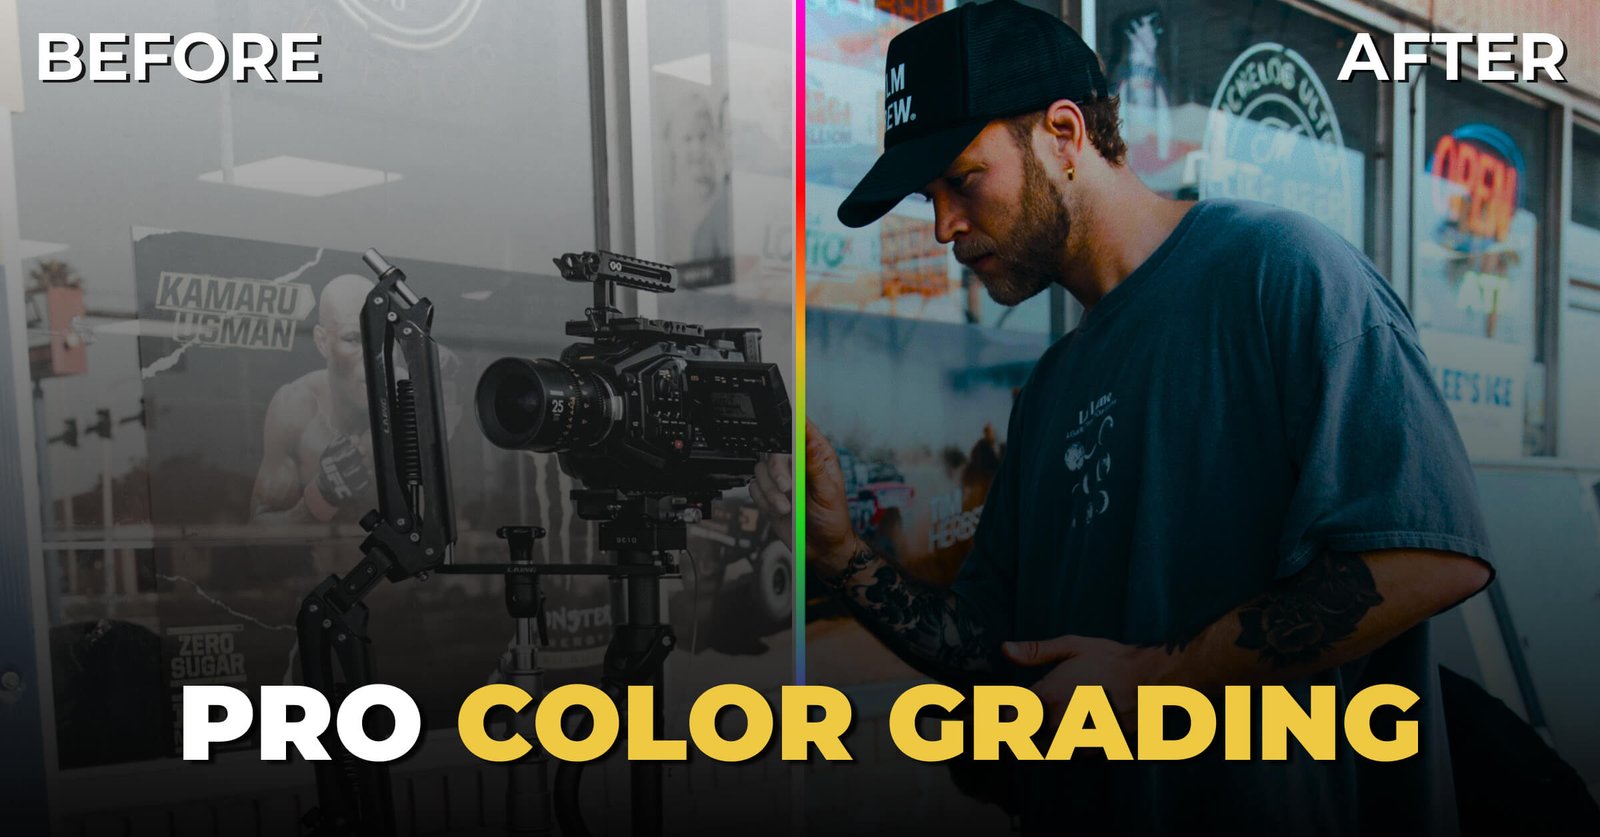
The Primaires Color Tab applies corrections to an image as a whole, while Windows Palette allows you to make changes in specific areas, such as changing the color of socks or lightening up face parts, which affects the background.
I have the perfect guide for you. It explains how to use the Windows Palette and Tracker Palette tools to create masks or stems that can be tracked easily.
Table of Contents
In this article, I will walk you through everything that a beginner who has just started using DaVinci Resolve needs to know so that it can perform well and navigate the app.
Let’s dive in!
Why Use the Windows Palette?
Use the Windows Palette mainly to color-correct specific areas of your image. Imagine that, for example, you are working on a scene, and the color of a T-shirt doesn´t fit properly. You can match the colors, but that will affect the rest of your image.
With the Windows Palette instead, you can direct a mask straight on that T-shirt and make adjustments in place without affecting the rest.
What if your subject is moving? Are you looking to mask every frame here manually? Not at all.
DaVinci Resolve — The Tracker Palette will enable you to automatically track the movement of your masked area so that all relevant points on their face are visible without adjusting or readjusting for accuracy in each frame.
In this article, we explore the Windows Palette in-depth, including how to create masks, work with them, and use the Tracker Palette to track motion across punctuated points.
After reading this guide, you can find and repair any area of your photo with surgical precision.
Windows Overview
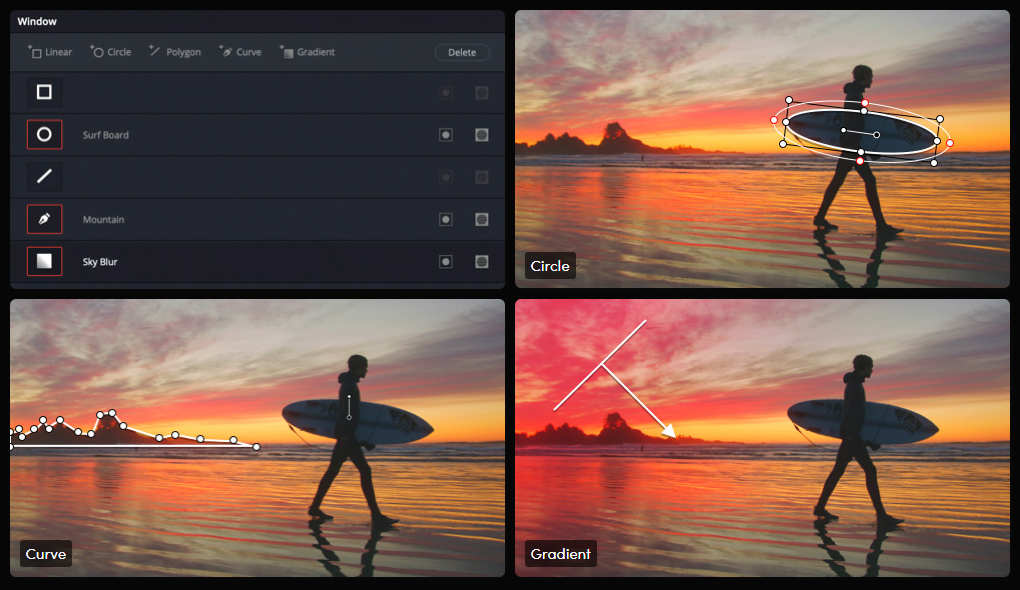
A few shapes and tools for masks are available in the Windows Palette. Some of these are linear, Circle, and polygon mask types, which can be created with different shapes depending on your needs.
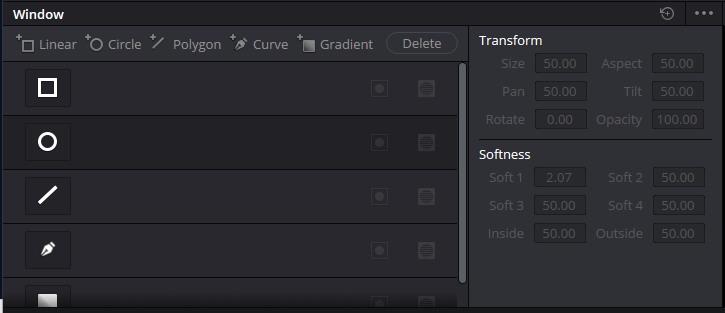
For more precision, Curves will allow you to draw custom masks with freedom of form by hand, and the Gradient tool is excellent for soft transitions.
Linear Window
A linear window is a good tool for making straight-edged masks. It is perfect for blanking out a rectangular portion of the image or when you want to introduce a sharp line.
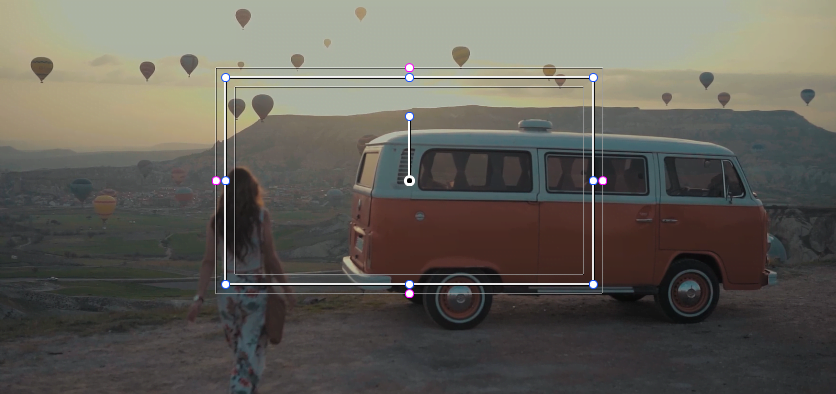
Just click on Linear, and a linear mask will be displayed over the image. Set the size and location of the mask as you need, rotate it if you like, and develop many lineate masks in one image.
Circle Window
The tool to be used for a round or elliptical mask is the Circle Window. If you ever want to mask out a face, spotlight, or anything circular, then the Circle Window makes masking circles as easy as toggling on and off after creating your circle directly in that window.
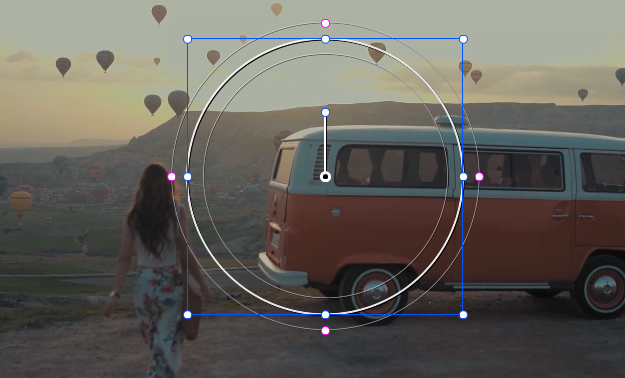
As with the linear window, you can create multiple Circle masks (or delete them) within an image at your leisure.
Polygon Window
Polygon Window — The polygon allows a little more flexibility in shape, as you can get multiple points.
Where the Linear Window allows you to only create straight lines, with the Polygon Window tool, you can make as many dots/points as are needed for your image — making even more complex shapes that match your image.
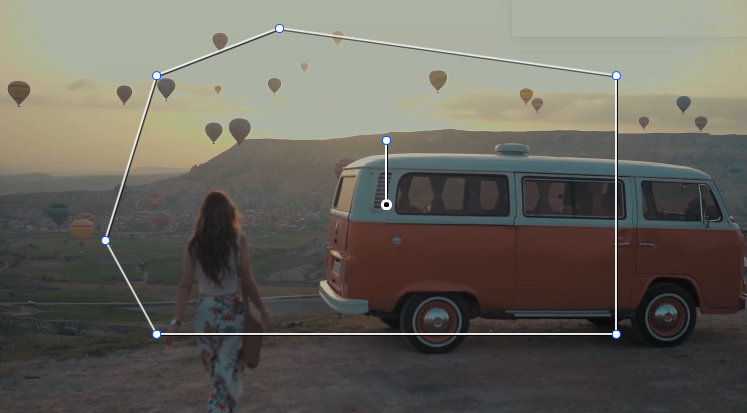
Segmenting an irregular shape or part of the image that has rough edges helps a lot. This allows you to create and erase points for the mask shape easily.
The Power of the Curve Window
In the Windows Palette, the Curve Window is far and away the most powerful.
This essentially lets you make freeform masks so you can easily feather or sharpen the edges of where your image is being affected. Mask out a complex shape or create a custom vignette… the Curve Window has your back.
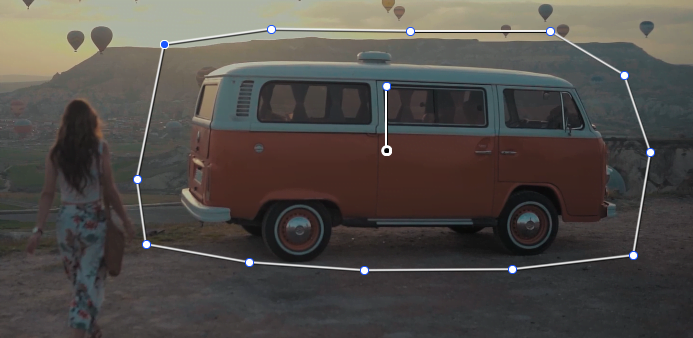
Select the Curve Window from the Windows Palette and draw your inner mask on top of the image. Because you can move points of your curve to whatever position, this gives you total control over the shape and size of a mask.
This adaptability level makes the Curve Window a must-have for a colorist.
Masking With Gradients: Fading In And Out
The Windows Palette allows you to apply the Gradient tool, which is ideally suited for smoothing any transitions within your image.
If you need to work a tiny bit on the sky of an image, darken it, or want gradation around your main subject, there are no problems with this Gradient tool.
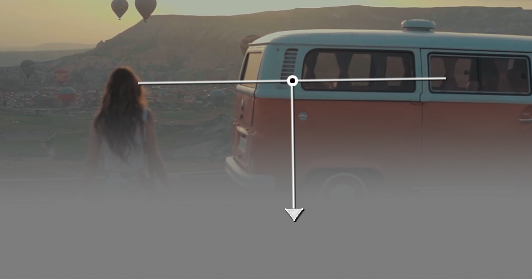
You can then draw (drag) the gradient mask on your image and double-click outside the area when satisfied with its placement.
We can use it to change the gradient’s angle, position, or softness to achieve our desired effect. Though it’s not as versatile as the Curve Window, the Gradient is essential for subtle and professional-looking effects.
Transforming Your Masks
After you have defined a mask using one of the tools in the Windows Palette, use various Transform options to refine it. With such tools, you can change the size and shape of your mask as needed.
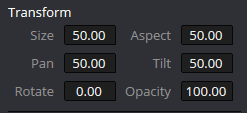
Adjusting Size and Aspect
Under Transform, you can scale and correct the aspect of your mask. Whether widening the mask to cover more ground or compressing it into a much narrower space for easier access, Transform options let your adjustments prototypically fit.
Pan, Tilt, and Rotate
In addition to resizing your mask, you can move it using the Position values to pan/tilt or rotate it and make another Region mask.
This is particularly helpful if you need to track your mask with a moving object or add angles/rotation to your correction. With these choices, you can also make your mask fit the image perfectly.
Softness: Feeling the Borders
One of the most critical aspects of developing a mask is clearly seeing what enters and exits this element.
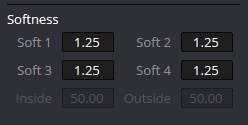
With the Softness option, you have some control over how much feathering affects each edge of your mask. This means you can soften one side more than the other while leaving the opposite end sharp, giving you control over your adjustment.
Additional Options in the Windows Palette
Windows Palette also empowers users with added features beyond the essentials of masking tools, such as inverting and saving presets.
Inverting Masks
In some cases, you will need to correct only outside the masked region. In these cases, you also have the option to invert!
Windows Palette—Each shape in this palette has its own invert option to flip the mask and fix it to a different area. Press “Shift + H” to toggle the Highlight option, allowing you to view only those areas in the image where a mask is created.
Reset and Preset Options
If you wish to reset your mask at any point, find the Reset option along with all the Painter commands at the top right corner of the Windows Palette.

Click the three-dot button and then click on “Save as New Preset” to save your existing mask as a preset. This is a fantastic time saver if you constantly use the same mask shapes and settings in your projects.
Shortcuts for Speed
Like the software, the Windows Palette in DaVinci Resolve offers shortcuts that can streamline your workflow when grabbing different masking tools.
Linear Window:
- Windows: Alt+Q
- macOS: Option+Q
Circle Window:
- Windows: Alt+C
- macOS: Option+C
Polygon Window:
- Windows: Alt+G
- macOS: Option+G
Curve Window:
- Windows: Alt+B
- macOS: Option+B
Color Masked Area: Shift+H
Bounding Box: Hold Shift and drag to create.
Tracking Your Masks
The Tracker Palette contains various tools for tracking your masks. To the left of those, you will find buttons to step or continue through a tracking process one frame at a time and another set of buttons to play and pause that tracked result. With these buttons, you can control the tracking process entirely and thus tweak it as desired.
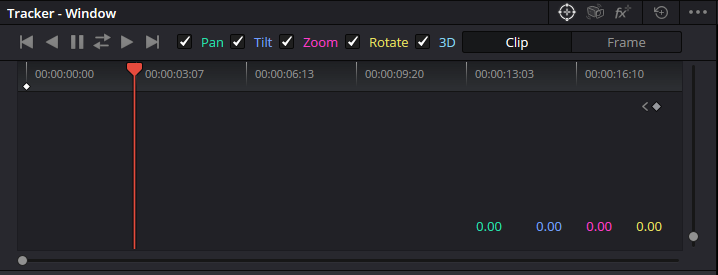
With pan, tilt, zoom, and rotate
Further down the list, you will also find options for enabling or disabling Pan, Tilt, Zoom, Rotate, and 3D tracking in part.

Know where you have some options to handle how the tracker will follow the movement of your mask. If you turn one of these off, the tracker will not track that type of motion — rather, just whatever is enabled. Customizable: Your masks are always in that perfect location for the image. took
Clip vs. Frame Tracking
Notice that you can track across all clips or just this frame while tracking a mask. Clip tracking is perfect for scenes with the same movement, so your mask moves throughout the entire clip.

In contrast, with frame tracking, you can provide specific adjustments for single frames—perfect for addressing anything an automated tracker might need help with.
Cloud Tracker and Point Tracker
DaVinci Resolve Studio 19 has two types of trackers: Cloud Tracker and Point Tracker. However, each type of visibility provides a benefit and drawback that makes it suitable for different projects.

Cloud Tracker
The Cloud Tracker (DA): The default DaVinci Resolve option tracks anything with large movements of relatively smooth, high-contrast details.
This is based on the general form and motion of masked regions but not specific details, so it may work well for things like faces or cars that tend to move fairly uniformly in a scene.
Point Tracker
The Point Tracker, however, is created for more specific tracking. Routes point in the masked area (perfect for objects with complicated or irregular movement).
The Point Tracker provides pixel-perfect accuracy when following a hand, an eye, or any other small detail, ensuring your mask will always match up.
Keyframing for Fine Control
Sometimes, the automatic tracker is not sufficient to achieve that perfect result. So when that happens, keyframing is your friend. Keyframes are markers you set that allow you to adjust your mask at various times manually.
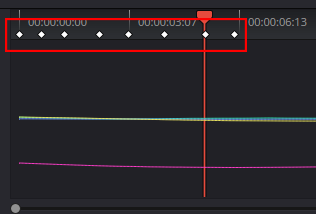
So, if you need a more complex mask movement than what can be automatically made with them, you would set keyframes and draw lines around the object since it is moving.
Adding Keyframes
To key a frame, you need to proceed with your timeline and make any adjustments at that point.
Create a keyframe in that spot and make your change — DaVinci Resolve will automatically save this for you. You can add keyframes around this to tweak how your mask moves across your whole clip.
Adjusting Keyframes
After you’ve made a keyframe, click on its icon in the timeline to change it. A menu will pop up, letting you adjust your mask’s size, position, rotation, and other settings.
These new keyframes work like regular effects and can be changed using the plugin settings. You can also delete them if needed.
This gives you full control over your keyframes, even if you use other effects simultaneously.
FAQs
So, what is the Windows Palette in DaVinci Resolve Studio 19?
A Windows Palette is a great feature that enables you to select an area of the image for correction. This means you can adjust different sections of footage differently, which offers more creative freedom over what your final product looks like – and in conjunction with color contrast features, helps separate elements even more!
What may be the Window panel contrasted with the Artisan Color tab?
Although the Primaries Color tab allows you to impose color correction on an entire image, with palette windows here is everything in more detail when editing one zone while not affecting others.
What kind of masks can I make with Windows Palette?
The masking options on the Windows Palette include Linear, Circle, Polygon and Curve masks as well as a Gradient tool that creates fading transitions.
What is the Curve Window in Windows Palette?
For more complex shapes or to create a custom vignette, the Curve Window will give you freeform masks with absolute precision over shape and size.
How do I work with the Gradient tool (in Windows Palette)?
How to Use the Gradient ToolIf you need a gradual transition between parts of your photo—such as the sky darkening or more light around the subject—use this type of tool.
How does Windows Palette have more Transform options?
And with the new transform options, you can scale, rotate and soften your masks enabling precision fine tuning of corrections.
Is There an Inventional Mask in Windows Palette?
Indeed, you may turn any mask around to tend overlying selections. It comes in handy when correcting everything but the masked part.
So, how does Cloud Tracker compare to the Point Tracker in DaVinci Resolve?
The Point Tracker is for high-accuracy tracking a small object with complex motion, such as an action figure or in this case the Star Cloud; and The Cloud Tracker excels at large area smooth movement.
Like all software, this sets keyframes in the Windows Palette. How?
If you add keyframes, the mask can be adjusted frame-by-frame in certain timeline spots to show exactly what happens at those times.
The Windows Palette is a tool for fixing colors in specific parts of a video. It has different shapes and tools to help you focus on the area you want to change.
Learning to use the Windows Palette lets you make any video look how you want, whether for a big movie or a small YouTube video. Start using it today—you’ll see how much you can do!
Happy grading!
